How to install hardwood flooring
Go from subfloor to breathtaking in as little as a day. Follow this guide for installing hardwood flooring in your home.
Hardwood floors are beautiful, last a lifetime, and are easy to install. With no special tools, you can go from subfloor to breathtaking in as little as a day. Before we get started with how to install hardwood floors, let’s cover a few basics.
Hardwood vs. Laminate Wood Flooring
Hardwood flooring is solid wood, cut from the tree. The three most popular wood choices include oak, walnut, and hickory, although maple and cherry are sought after as well.
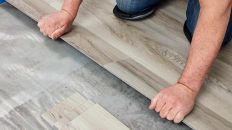
Laminate “wood” flooring consists of several layers of material laminated together to resemble real wood—an underlayment, a composite wood-fiber core, a high-resolution woodgrain photograph, and a clear protective sealer that resists scratches and fading.
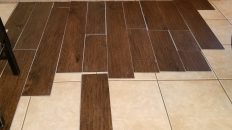
While laminate flooring has come a long way as far as durability and appearance are concerned, it’s not solid wood and isn’t installed in the same manner.
Tips on How to Install Hardwood Flooring:
Hardwood floors should be installed over ¾-inch plywood on or above grade—not in a basement and never directly on concrete.
Always follow the manufacturer’s instructions.
To determine the amount of flooring you’ll need, multiply the length times the width of the room to get the square footage, then add 10 percent for waste and damaged boards.
Install hardwood floors perpendicular to the floor joists, parallel to the longest wall, leaving a ¾-inch expansion gap around the perimeter.
Join the ends of the boards over a floor joist, where possible, avoiding joints that form an H. Keep joints that line up at least two rows apart.
Before starting, calculate the width the last row will be. If it will be less than an inch, cut the width of the first row in half.
Steps for Installing Hardwood Floors:
Ready to transform your space with new hardwood flooring? Follow these instructions on the installation of wood floors.
Acclimate the Flooring
Let flooring acclimate to the room temperature and humidity for three to five days prior to installation. That’s a good time to lay the boards from several cases out on the floor and mix them up to vary the shades and lengths. (Cases tend to be all the same shade.) Arrange them in the way you’ll install them.
Now’s also a good time to check for damaged or warped pieces. Don’t throw them away; they may come in handy later.
After the boards have acclimated, choose the straightest ones for the first 2 rows.
Prepare Your Subfloor
Remove old flooring and any residue. Remove carpet strips and baseboards. Vacuum.
Old flooring materials may be made of asbestos. If you’re unsure, consult with a professional.
Install the Boards
The first and last rows of the room have to be nailed through the face of the board. (If you have no experience, screwing these rows will make them easier to remove, if necessary.) All other rows will be nailed through the tongue. If you’re not using a flooring nailer, drill 1/32-inch diameter holes 1/2-inch from the grooved edge to prevent splitting.
Lay the first board on the line you snapped, groove toward wall. Set ¾-inch spacers for the expansion gap along the length and at the end between the board and the wall.
Drive flooring nails through the pre-drilled holes.
Tap the next board in place using a tapping block and mallet. Nail in place.
Countersink all the nails.
When you get to the end, cut the board to fit (face side up on the saw), remembering to leave the ¾-inch expansion gap.
Now, blind nail at a 45-degree angle along the tongue edge at every floor joist down the length of the row.
To start the second row, push the groove of the board onto the tongue of the first row and tap together with a tapping block. Continue down the row, remembering to stagger the joints by at least 6 inches. When the row is done, blind nail in place.
Continue installing the rest of the boards, remembering to stagger the joints, maintain the expansion gaps, and mix boards from different boxes.
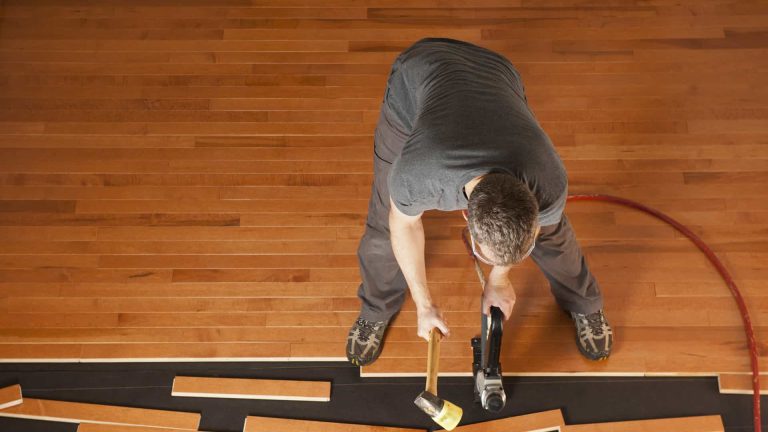
At this point, you’ll have the room to use a floor nailer. Position it to drive the nail through the tongue and tap with a mallet. Adjust the air pressure on the nailer if necessary, to countersink the nails.
Use a jigsaw to cut around any vents or jogs, like a fireplace hearth, to fit the boards.
Face-nail the last two rows along the tongue side. You won’t have the room to continue using the flooring nailer, so remember to drill 1/32-inch diameter pilot holes, ½ inch from the edge, to prevent splitting.
You may need to cut the length of the boards to fit in the last row. Remember to leave the ¾-inch expansion gap. Use a pull bar to click the boards together. Then, face nail.
To finish, cut the excess underlayment and sand and stain if necessary. Then, fill the nail holes with matching wood putty and replace the baseboards and shoe molding to cover the expansion gap.
Finally, add the thresholds for a complete installation.
- Tools & Materials:
- Flooring and underlayment
- Mallet
- Nail setter
- Drill & bits
- Pry bar
- Claw hammer
- Tape measure
- Long level
- Moisture meter
- ¾-inch spacers
- Tapping block
- Chalk reel
- Table saw
- Jigsaw
- Using a pneumatic nailer or flooring nailer, with nails and staples to fit, is optional
READ ALSO: How to Install Vinyl Plank Flooring in Kitchen
Thanks for reading “how to install hardwood flooring“