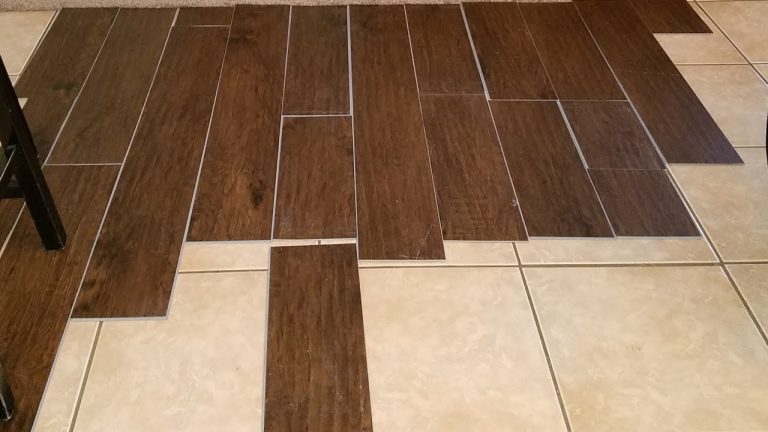
How to Install Vinyl Flooring over Tile
The question is Can You Install Vinyl Flooring Over Existing Ceramic Tile?
The short answer is yes, you can install vinyl flooring over existing tiles. However, like any vinyl flooring installation, the tile surface must be properly prepared before installation.
Benefits of Covering Floor Tiles with Luxury Vinyl
Covering floor tiles with luxury vinyl is a great way to update your flooring without gutting out your old tiles. This will save you time and labour costs associated with tile removal. And as mentioned, luxury vinyl flooring is durable, easy to maintain, and cost-effective.
Be aware though that the tile surface needs to be checked and prepped before you proceed with the installation.
How to Install Vinyl Plank Flooring Over Tile?
Acclimatize Your Luxury Vinyl Flooring
This is an important step prior to installing your luxury vinyl flooring.
The product, adhesive and subfloor should ALL be maintained at the same temperature between 15-28°C in the room in which it is to be installed for a minimum of 24 to 48 hours (as per manufacturer’s recommendation) pre-installation. Acclimatization is critical because vinyl is reactive to temperature change. This will prevent gapping and peaking of your planks.
Prepare the Subfloor for Luxury Vinyl Installation
Before installing luxury vinyl it is important to properly prepare the subfloor. For other types of flooring, this means removing any existing flooring and adhesives. But since we are dealing with existing floor tiles, that step won’t be necessary unless the floor tiles are already covered with carpet or other floor covering.
But we still have to inspect the tile surface as we would any subfloor. It should be structurally sound, plain, smooth, clean and dry.
Any loose or powdery material must be removed and the surface should be thoroughly washed to remove any surface contaminants and then left to dry.
Most of the time, the luxury vinyl manufacturer will recommend using a self-levelling compound to level all joints between the tiles as well as the dips or humps present. This helps create an even surface ready for laying down new luxury vinyl planks without any potential issues arising from those imperfections previously present.
Applying this compound requires mixing together two parts powder (usually cement based) along with one part liquid (typically water) until reaching a thick paste-like consistency prior to spreading to the surface via trowel/squeegee depending upon size/depth involved.
Let the levelling compound dry according to the manufacturer’s instructions.
After drying, sand the levelling compound as necessary and vacuum the area to get rid of debris.
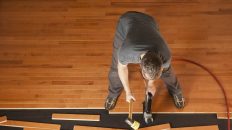
Measure and Cut the Vinyl Planks to Fit the Room Layout
Before proceeding to installation, check each plank for any manufacturing defects.
It is recommended that the boards be fitted to run the length of the longest, straightest wall. In narrow hallways, install the floor parallel to the length of the hallways.
Measure the room and find the centre line and mark it. This is where you will start putting down your planks to ensure a straight and symmetrical installation. You can shift the starting point a little bit to prevent unnecessary small cuts on your planks.
It helps to dry lay the planks first before actual installation. This means laying down the planks without the adhesive to see the optimum way to arrange the planks and determine the sizes of cuts.
The next is cutting each plank to fit within your room layout. To ensure accuracy, use a tape measure or laser leveller tool while making measurements. When cutting planks with a saw blade or utility knife, be sure to wear protective eyewear and gloves for safety purposes.
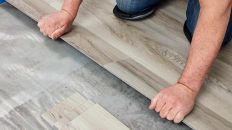
Apply Adhesive to the Floor and Lay Down the Planks in Place
Once you have cut all of your planks down according to size, it’s time to apply adhesive to the floor surface. Make sure that you spread an even layer of adhesive across each plank using a trowel or putty knife.
After applying the glue, allow it to dry a little bit until the glue is tacky (slightly sticky and not yet dry). The length of time will depend on the adhesive that you used. Refer to the manufacturer’s instructions.
Place planks into the adhesive and roll using a luxury vinyl floor roller to ensure good adhesive transfer.
Seal Around Edges and Perimeter of Room with Caulk or Grout Sealant
After applying adhesive along all sides of each plank, it’s important that you seal around the edges and perimeter of the room with caulk or grout sealant in order to protect from water damage caused by spills or moisture seeping through cracks between planks over time. This will also help keep dirt out which can cause discolouration if left unchecked for too long periods of time.
By following these steps carefully when installing luxury vinyl over existing tiles, you can enjoy years worth of beautiful floors without having to worry about costly repairs down the line due to improper preparation beforehand.
Do Finishing Touches for Luxury Vinyl Installation Over Tiles
After installing luxury vinyl over existing tiles, there are several finishing touches that should be completed in order to ensure a professional look. Adding transition strips between rooms or different floor types is one of the most important steps in completing your luxury vinyl installation. Transition strips provide an aesthetically pleasing way to join two different floors together while also providing a smooth transition from one surface to another and protecting the edges of both surfaces from damage.
Installing baseboards or quarter-round mouldings around the perimeter of the room is also recommended for a polished look. Baseboards and quarter-round mouldings help protect walls from scuffs and scratches caused by furniture, as well as give any room an extra touch of style.
Lastly, it’s important to clean up any excess adhesive, caulk, or grout sealant used during installation before enjoying your new flooring. This will help prevent dirt buildup which can cause discolouration over time and detract from the beauty of your new flooring investment. With these few simple steps, you can have peace of mind knowing that your luxury vinyl installation was done correctly and with care!
Maintenance Tips for Luxury Vinyl Floors Over Tiles
Maintaining luxury vinyl floors over existing tiles is an important part of keeping them looking their best. Regular vacuuming will help to remove dirt and debris from the surface of the flooring, while spot-cleaning spills immediately with a mild soap and water solution can prevent staining or discolouration. It’s also important to avoid using harsh chemicals or abrasive cleaners on luxury vinyl floors as these could damage the material.
Vacuuming regularly is one of the most effective ways to keep your luxury vinyl floor in top condition when installed over existing tiles. A good quality vacuum cleaner should be used that has been specifically designed for use on hard surfaces such as this type of flooring. This will ensure that any dirt and debris are removed quickly and efficiently without damaging the material itself. Vacuuming should be done at least once a week, but more often if possible, especially in areas where there is heavy foot traffic or pets present in the home.
Spills should always be cleaned up immediately with a mild soap and water solution before they have time to set into the material causing staining or discolouration. For tougher stains it may be necessary to use a specialty cleaner specifically designed for luxury vinyl floors; however, care must be taken not to use any harsh chemicals or abrasive cleaners which could damage the finish of your flooring over time.
Finally, it is important not to forget about regular maintenance such as sweeping away dust particles from corners and crevices using a soft brush attachment on your vacuum cleaner every few weeks. Additionally, it is beneficial to check periodically for signs of wear-and-tear caused by furniture legs dragging across its surface which may require additional protection such as felt pads underneath them if needed. Taking all these steps together will help you keep your luxury vinyl floor looking great even when installed over existing tiles.
READ ALSO: How to Install Hardwood Flooring
Thanks for reading “How to Install Vinyl Flooring over Tile“